


I guess there are few Middle Eastern sweets as irresistible as freshly baked Knafeh Nabulsieh (Kunafa Nabulsia), served piping hot from the oven! This iconic Palestinian cheese dessert features a luscious, stretchy cheese filling wrapped in crisp, golden shredded filo pastry and finished with a generous drizzle of fragrant sugar syrup. Every bite is a heavenly combination of crunch, sweetness, and melty cheese.
Today, I’m sharing a different version of knafeh from the one I grew up eating in Beirut: Knafeh Nabulsieh, a beloved Palestinian dessert that originated in the city of Nablus in the West Bank. If you love traditional Middle Eastern desserts, this cheesy, syrup-soaked kunafa is one you simply have to try!

Zahira’s Old Recipe: My First Taste of Palestinian Knafeh Nabulsieh
As far as I can remember, this little gem of a recipe came from my Palestinian friend Zahira. I found it scribbled on a torn sheet tucked into one of my notebooks, and somehow, I had never gotten around to making it!
Last week, while hosting a group of friends for iftar during Ramadan, I finally decided to give Zahira’s old recipe a try. It was my very first attempt at making Palestinian Knafeh Nabulsieh (Kunafa Nabulsia), and what a lovely evening it turned out to be! We gathered around the table on a warm evening, enjoyed each other’s company, and savored every bite of this cheesy, syrup-soaked dessert. My guests were absolutely blown away by its taste!
Naturally, the conversation turned to the big question: which version is better, Lebanese knafeh or Palestinian Knafeh Nabulsieh? We had quite a debate! I guess it takes a little humility to admit that choosing a winner is no easy task, especially when it comes to a dessert as beloved as knafeh. The truth is, both versions are simply wonderful, each with its own distinctive character and charm.
Keep this Palestinian kunafa recipe for a special occasion, a festive iftar, or whenever you want to surprise your guests with a truly memorable Middle Eastern dessert. Trust me, it is worth the effort!

Frequently Asked Questions About Knafeh Nabulsieh (Kunafa Nabulsia)
Should the sugar syrup be cold or warm when poured over knafeh?
The sugar syrup should be cold when drizzled over the warm, freshly baked Knafeh Nabulsieh. This contrast helps the kunafa absorb the syrup while preserving its deliciously crispy texture. For convenience, prepare the sugar syrup one or two days ahead and store it in the refrigerator until ready to use.
Can I prepare Palestinian knafeh a day ahead?
Yes! You can assemble the Knafeh Nabulsieh a day in advance and bake it just before serving. Cover it well and refrigerate until you are ready to bake. This makes it a wonderful dessert for Ramadan iftar gatherings, dinner parties, and special occasions.
How do I desalt Akkawi cheese for knafeh?
Akkawi cheese needs to be desalted before using it in knafeh because it can be quite salty. Cut the cheese into small squares, place them in a bowl, and cover with water. Soak for approximately 8 hours, changing the water every hour to help remove the excess salt. Before using the cheese, drain it thoroughly.
What is the best substitute for Akkawi cheese in knafeh?
If you cannot find Akkawi cheese, a mixture of mozzarella and ricotta is a good substitute. Mozzarella provides the characteristic stretchy, melty texture, while ricotta adds creaminess. This combination helps recreate the soft, cheesy filling of traditional Palestinian Knafeh Nabulsieh.
How do I store and reheat leftover knafeh?
Store leftover knafeh in an airtight container in the refrigerator. It can retain much of its delicious texture for several days, although the crust may gradually lose some crispness. To reheat, place the leftovers in an oven-safe pan, cover with aluminum foil, and warm in a preheated oven for 10–15 minutes, or until heated through. For a crispier top, remove the foil toward the end of reheating.

How to Prepare Authentic Knafeh Nabulsieh
1. Desalt the Cheese: Cut the cheese into small cubes and place them in a bowl of water, making sure the pieces are fully submerged. Let them soak for about 8 hours, replacing the water every hour to gradually draw out the excess salt. Once the cheese has reached your desired level of saltiness, drain it well before adding it to the filling.


- In a heavy-bottomed saucepan, melt the butter over medium heat.
- Remove from the heat and let it stand for about 15 minutes, allowing the milk solids to settle completely to the bottom.
- Line a fine-mesh sieve with several layers of cheesecloth and place it over a heatproof bowl.
- Slowly pour the melted butter through the lined sieve, leaving the milk solids behind. Discard the solids and reserve the clean clarified butter for the recipe.

3. Preparing the Kadayif (Shredded Filo Pastry): If using frozen shredded filo pastry, allow it to thaw completely first. Gently pull the strands apart with your hands to loosen them and form a fluffy, loose pile. Transfer the pastry to a food processor, working in batches if necessary, and pulse a few times until the strands are cut into shorter pieces. Be careful not to over-process them; you want the pastry to remain coarse rather than finely ground.

4. Preparing the Cake Tin with Clarified Butter and Food Coloring: Pour ¼ cup of the prepared clarified butter into a 30 cm (12-inch) round cake tin. Add a small pinch of red food coloring and use a pastry brush to mix it cleanly into the butter, spreading it evenly over the entire bottom surface of the tin.


5. Coating the Kadayif with Clarified Butter: Using your hands, gently toss the shredded filo pastry with the remaining clarified butter, making sure all the strands are evenly and thoroughly coated.

6. Pressing the Kadayif into the Cake Tin: Transfer half of the buttered shredded filo pastry to the prepared cake tin. Press it firmly over the bottom and slightly up the sides, using the flat bottom of a measuring cup to create an even, highly compact base layer.


8. Adding the Top Layer of Kadayif: Spread the remaining shredded filo pastry evenly over the cheese filling, making sure it completely covers the cheese beneath.


7 Traditional Middle Eastern Desserts Served with Sugar Syrup
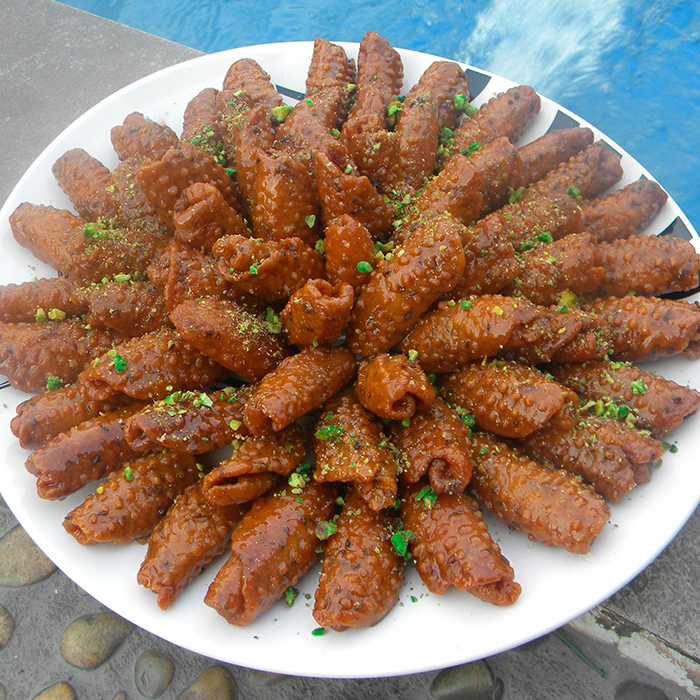
- Awamat (Lebanese Doughnuts)
- Halawet El Jiben
- Knafeh Bil Ashta
- Ashtalieh/ Ashtalleya with Desiccated Coconut
- Bread Knafeh
- Znoud El Sit
- Ma’akaron, Lebanese Anise Fritters
 Let’s Stay in Touch!
Facebook, Instagram, YouTube , Pinterest and TikTok!
Before assembling the layers, you will need to prepare the traditional sweet syrup. Here is a detailed recipe on how to make Ater (Arabic Sugar Syrup) that coats the pastry perfectly.➡️ Lebanese Sugar Syrup Recipe (Ater) — Click here
Nabulsi Knafeh/Kunafa,/ Knafeh Nabulsieh
Description
Ingredients
- 500 g 1 lb 2 oz kataifi strands (kunafah strands or shredded phyllo pastry)
- 400 g 14 oz unsalted butter
- 1 kg 2 lb 4 oz Akkawi cheese
- Red food coloring powder preferred
- 3 cups sugar syrup at room temperature
Instructions
- Desalt the Cheese: Cut the Akkawi cheese into medium-sized squares. Cover with fresh water and soak for 8 hours, changing the water every hour to completely remove the saltiness. Drain thoroughly and set aside.
- Prepare the Syrup: Prepare the sugar syrup by following the step-by-step guide linked above the recipe box. Set it aside to cool down completely to room temperature before assembling the dessert.
- Clarified the Butter: Melt the unsalted butter in a heavy-bottomed saucepan over medium heat. Remove from heat and let it rest for 15 minutes until the milk solids settle to the bottom. Line a fine-wire sieve with several layers of cheesecloth. Carefully pour the liquid butter through the cheesecloth into a bowl, discarding the milk solids at the bottom.
- Prep the Pastry: Defrost the shredded kataifi pastry if frozen. Gently pull the strands apart with your hands into a loose pile. Place the pastry into a food processor (in batches if necessary) and pulse a few times to chop it into coarse pieces.
- Color the Pan: Pour ¼ cup of the clarified butter into a 30 cm (12-inch) round baking tin. Add a small pinch of red food coloring. Use a pastry brush to blend and spread the colored butter evenly across the bottom and sides of the tin.
- Combine Pastry and Butter: In a large bowl, thoroughly mix the remaining clarified butter into the processed pastry using your hands. Divide the buttered pastry into two equal portions.
- Assemble the Base Layer: Transfer the first portion of pastry to the prepared baking tin. Press it firmly into the bottom and slightly up the sides of the tin, using the flat bottom of a measuring cup to pack it tightly.
- Add the Stuffed Cheese: Arrange the strained Akkawi cheese in an even layer to completely cover the pastry base.
- Top and Bake: Cover the cheese entirely with the remaining portion of pastry, pressing down gently with your hands. Bake in a preheated oven at 200°C (400°F) for about 30 minutes, or until the knafeh turns golden-brown and crisp on the edges.
- Invert and Serve: Remove from the oven and carefully loosen the edges with a sharp knife. Invert the hot knafeh onto a large serving platter. Immediately drizzle ½ cup of the cooled sugar syrup evenly over the top. Serve warm, offering additional syrup for individual slices.